Monday 3 November 2014

The amount of times...

Seriously, only God knows that I am always trying to start a blog and always failing spectacularly... Stuff always seems to come up! Like school work, or a holiday, or exams etc.. that just make me forget about it completely! But now I have no excuse, I am on a gap year and WILL do something productive with my time! (I guess defining writing a blog as productive is open to interpretation hehe.)

So here's to ANOTHER new start, and attempt at trying to write some interesting stuff for people to read (that someone else out there has probably already covered on their blog.) I hope to be slightly better this time around..

Here's to the first post of many!


Friday 1 June 2012

D.I.Y Ear Cuff Earring!


Using old jewellery, pliers and glue - this d.i.y will only take you around 20 minutes :)
Here’s my tutorial on how to make your own :)

You need some old jewellery which i think is safe to say almost everyone has, for the chain you don’t need to go out and buy some because it’s everywhere! on the ends of necklaces and bracelets, i used a very thin chain from a childhood necklace because i wanted layers, but if you want a singular chain then you want to go a bit bigger:
Above is the thin chain i used, and a bigger style of chain that was on the end of the necklace which i think would be more suitable if you only want one line of chain .
I cut the chain into various lengths so that they would all hang at different heights, i then used an old mismatching earring and slid the last loop of each section onto the earring, once in place you want to glue it to the earring so it is secure.
Next i needed a singular loop of chain to attach all the other ends of my dangling sections too, i got this from an old necklace i will never in my life wear, it only need to be small but large enough to fit the chain ends and whatever you want to cuff around you ear on to. I used pliers to open it up and then slide all of the chains onto it and used the pliers to close it so they were secure! Glue is not needed!
So if you have a cartilage piercing here is were you are finished! You just slide the chain link onto another earring, glue it in place and you’re good to go :)
Making the ear cuff is very simple, again i resorted back to my old necklace and used my pliers to extract another link of chain. This is the part that will actually cuff around your ear, so it has to be large enough do to so. Your small loop will also slide onto this like so:
and there you have it, your own ear cuff so you spend £0 and a half an hour of your time instead of £8 on a shop bought one :)
The best part is you can customise it however you want, e.g. the stud earring you choose to use, the chain you choose to use, you can hang this from the ear cuff if you want to ot hang this from the chain! It’s completely up to you :)
Hope you enjoyed it!


D.I.Y Bow Shorts!


My first tutorial on how to customise an old pair of jeans into a pair of unique shorts. This only cost me £4 to make!
Find out how!
You will need:
  • A pair of jeans
  • Scissors (Fabric scissors will make things easier)
  • Chalk/An easily washable means of marking fabrics
  • A needle
  • Suitable thread (Although none of the thread should be visible so colour is not entirely important)
  • Pins
  • And if you’re a perfectionist a tape measure!
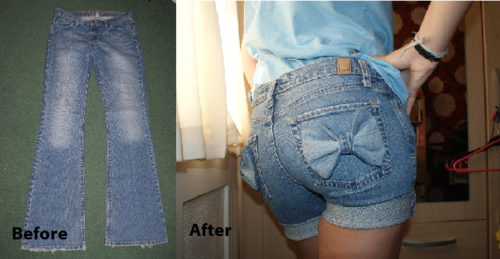
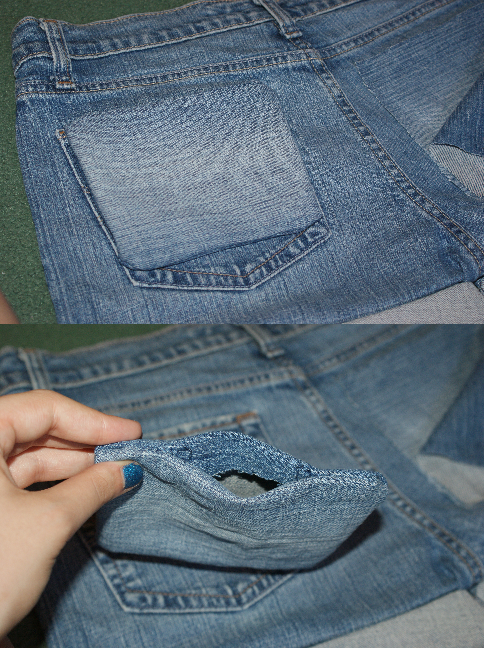
Firstly, i bought a pair Abercrombie & Fitch jeans off of eBay for £4 - they were flared and frayed at the bottom but that didn’t matter, all you need is a pair of jeans in good condition (flares/bootleg are actually easiest to work with i think). 
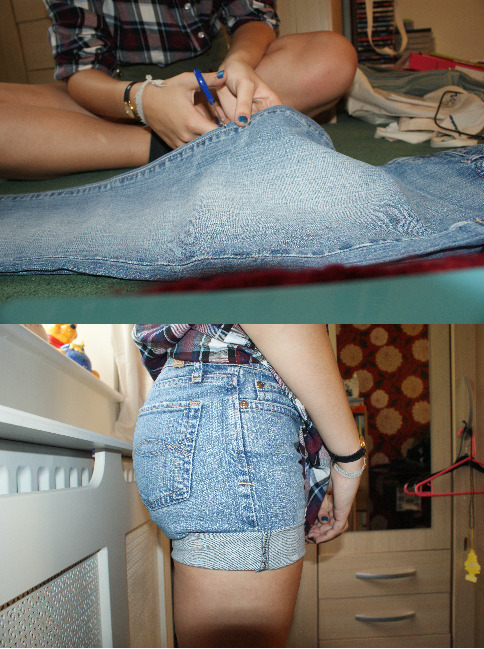
Once my jeans had been delivered i first had to make them into basic shorts by cutting off the ugly flares, i used the chalk (white, so unfortunately does not show up with the flash of the camera) i marked about halfway down my thigh because i wanted to roll-up the shorts. You should always fold it over at least twice so as to complete a full roll or else the cut edge of the jeans will still be on show. I am not lucky enough to own fabric scissors so i had to make do with the pair in the sewing kit.
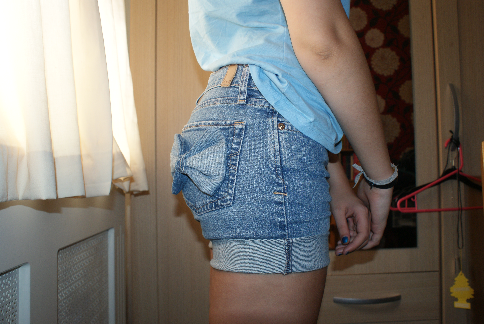
Now you have the basic shorts! Already the jeans look 100% better and almost unrecognisable (plus buying off eBay means you can get the designer labels for dirt prices)
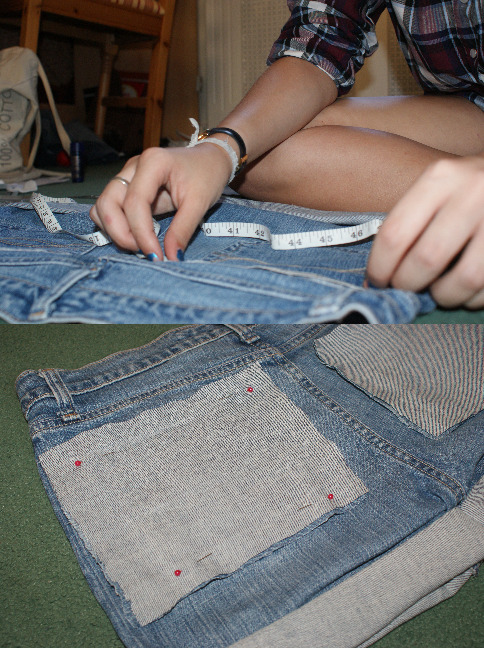
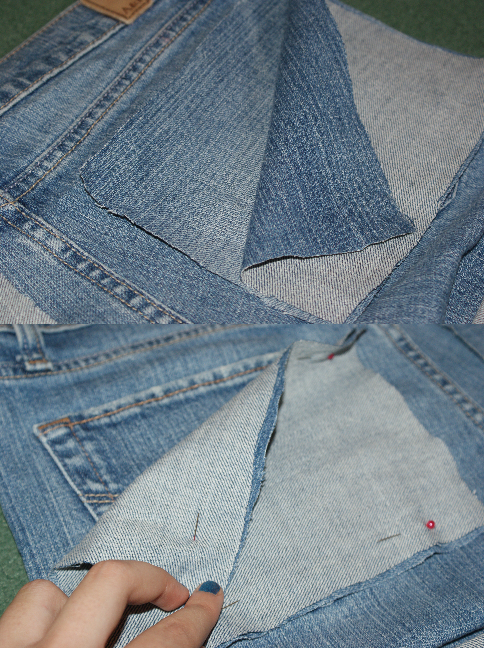
Making the bows is simple enough, using the cut off flared parts of the jeans you want to cut two rectangles for each pocket (two back pockets = four rectangles, two for each one). These need to be cut larger than the actual pockets, so measure the size of the pocket and add two or three inches to the length and two to the height.
As you can see in the picture above i have placed two of the rectangles on top of each other and they are the same size, i placed them with the outside of the denim touching/facing inwards like so:
I pinned the two pieces together (not to the shorts) and i made the head of the pin align with the corners of the pockets, so i could have a mental image of the pocket shape. 
Then sew the two pieces together like so:
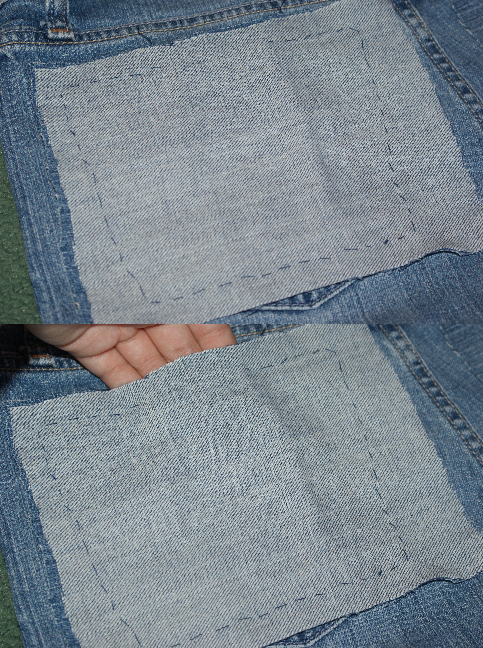
Clearly neatness is not an issue, but don’t be too careless either! VERY IMPORTANT DO NOT SEW ALL THE WAY AROUND! you need to leave a wide gap at the top or bottom (not sides!) See where my fingers are? You still have to sew along the line, just not the middle. This is vital because otherwise you can’t turn the pocket inside out. Which is exactly what you have to do next, just turn it inside out:
Now that looks a lot more professional and neater, next step is folding it into a bow shape, this is really easy you just pinch up the middle, then fold in the top and bottom towards it so it should look like this:
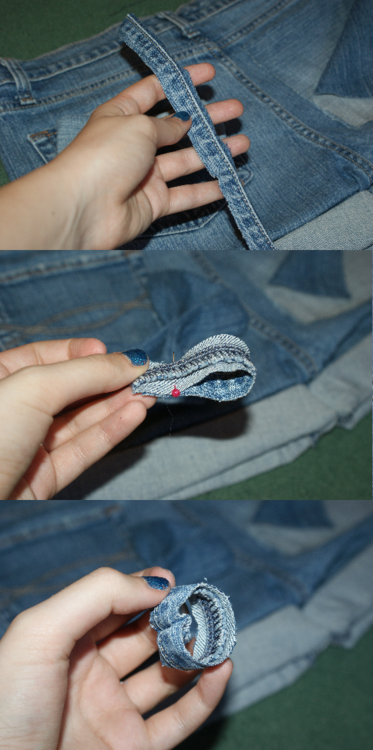
I pinned it with a… pin, and then roughly and untidily stitched it together (how neat you want to be really depends on you!) For the middle part of the bow you need to resort back to you cut off jean legs and you need a small section of the seam that runs up the side. cut a thin-ish piece and a suitable length to wrap around the middle of the bow. Again you want to sew this so add an extra inch or two to the length and fold it inside out! You want to sew it the ‘wrong’ way so you can turn it the right way and no one will be able to see your sewing!
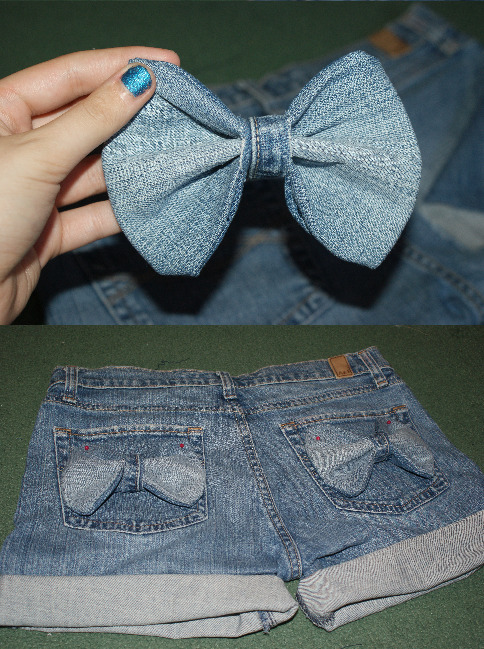
Just slide this onto your bow and viola you have a denim bow! Now you have to make another one!
Next is simply sewing the bows onto you pockets. If the edges of you bow fall in line with the seams of the pockets you could use a sewing machine but mine sadly fell short, so using a sewing machine would mean sewing the pocket to the short back… hand sewing it was. Because the bow is two layers of denim i found a way to sew just through one layer so the stitching is invisible from the outside! I pinned the bows to where i wanted them on the pocket then just sewed away until i was finished :)
When both are sewn on you’re finished! I hope this was helpful and easy enough to understand and follow and if you try it let me know, i’d love to see! :) 


Tuesday 17 April 2012

Prom!

I never thought prom was a big deal here in England, but apparently so because despite the fact it is a agonising two months away most people have already ordered their dress! So as of tonight so have I! This dress I was originally planning on wearing to a masquerade ball in March but i wore a different dress, and this seems perfect for prom. I got this dress of eBay for £45 but sadly for me it is now available for as low as £26 :( but hey-ho, it is lovely! Plus the original website i found it (i can't remember the URL sorry) it was definitely over £150 so it's still a bargain.
This is not me! Haha I am very worried of being able to pull this off as well as the model... i may have to drop a pound of two... Anyway! This is my beloved dress, I am yet to try it on because it hasn't been delivered yet and I am weary that the top may be slightly uncomfortable/rub on my skin? But I know a strapless bra is definitely needed and for shoes i was thinking these cuties from schuh.co.uk for £65.


Now i just need to search for a clutch bag...


Sunday 1 April 2012

Bralet Appreciation Post!

So after discovering i'm not alone in loving the new bralet craze i have created a post dedicated to them! So here's my selection the of tight fitting beauties:


So, here they are! Each bralet is from a different online store so that you can see just how big a variety there are, unfortunately this meant i couldn't review my FAVOURITE tops. Alas, each of the above is beautiful anyhow.


  1. White Studded Bra Top - Miss Selfridge -  £24 - I was originally going to review a similar bralet from Topshop for a massive  £38! So this was a great find and just confirmed my belief of checking everywhere before making a purchase... I really like the simplicity of this bralet, and the studded embellishments top it off nicely. The Topshop version of this also comes in black, however unless you're willing to pay a further  £14 i would suggest sticking with white! Miss Selfridge have a wide range of lovely bralets so it's definitely worth a browse through their collection.
  2. Hawaiian Print Bralet - Topshop - £25 - This was my replacement bralet from Topshop after finding the Miss Selfridge alternative. This is a very bold brightly coloured bralet which i think would work best with denim, or black shorts (for some reason i can't picturing this being complemented by a skirt?) But the Hawaiian print definitely offers a much wanted summer feel!
  3. Laura Striped Bow Back Bralet - Boohoo -  £12 - On the cheaper end of the scale, i was slightly disappointed with boohoo's collection of bralets and this was i think the best of the collection and is by far not one of my favourites out there. Nonetheless boohoo do still have a range of bralets and considering the price compared to some others on the market i won't complain too much! This bralet has a bow fastening on the back (if you didn't gather that from the name!) and has the striped sailor look as mentioned in one of my previous posts.
  4. Bustier - H&M -  £12 - This is the only bralet in the h&m range, so if you don't like it don't bother checking out their website! Again a very reasonable price and i much prefer this design compared to the boohoo one (just a matter of opinion). This is a very girly design with cute strawberries dotted all over, very much a daytime top for the upcoming spring and summer months!
  5. Scarf Print Sweetheart Bralet - Newlook -  £7.99 - The cheapest bralet i've featured! Granted the material does look on the thin side and it doesn't look like it offers much support so i would probable continue to wear a bra underneath. But i love the design and if you're a brave soul who likes to mix n' match prints then i think this would be ideal for you!
  6. Sally Floral Bralet Top - Missguided -  £20.99 - So back up to the slightly more expensive side of things, missguided for me is still messing around (is anyone else having a problem of keeping things in their basket in order to pay, i can't even sign in?!) but back to the bralet... This is one of my favourites, i love the colours and the design and the shape... I just love is particular bralet! There are so many colours which leaves a wide range of matching opportunities and the black base means you could still keep it simple. This bralet compared to the Newlook one, seems to offer LOTS more support so i think i would feel more comfortable whilst wearing it.
  7. Fringed Cropped Bra - Urban Outfitters -  £20 - Okay, so does anyone watch 'Take Me Out' on ITV1? Well if you do a girl called Annie (is it sad that i know the girls names?) was wearing an extremely similar top to this in the week she got picked to go on a date! So perhaps men like the fringed look, that is supposing she only got picked for her choice in bralet but anyway... I don't think the picture above does the top justice, because Annie who wore it on 'Take Me Out' was much more bustier and the bralet looked so much nicer on her, however the Urban Outfitters models are all clearly a size zero and as a consequence - not the bustiest of women. 
  8. White Polka Dot Bow Back Bralet - River Island -  £16 - Lastly a contrasting polka dot number. I'm not sure how i feel about this bralet because i'm so in love with the striped sailor look going on right now i feel polka dots are just completely in the opposite direction of fashion... Much like boohoo i was disappointed with River Island's collection, they don't have much to offer and although they do have a nice black lace bralet here i chose the polka dot one because of it's contrasting-ness(?) 

So, i hope i delivered a wide enough range of circulating bralets! Something i noticed on the missguided website was that the model was wearing a size 10, yet in other items of clothing (just normal tops, jeans, etc...) She wore a size 8? That being the case i don't know whether bralets fit differently to other tops so i would judge the size you buy on your bra size not clothes size. I would also like to point out that most stores (online at least) are having mid-season sales at the moment so hurry hurry and get some bargains while you can!


blogger template by lovebird